 |
 |
 |
 |
 |
 |
 |
 |
 |
 |
 |
 |
 |
 |
 |
 |
 |
 |
 |
 |
|
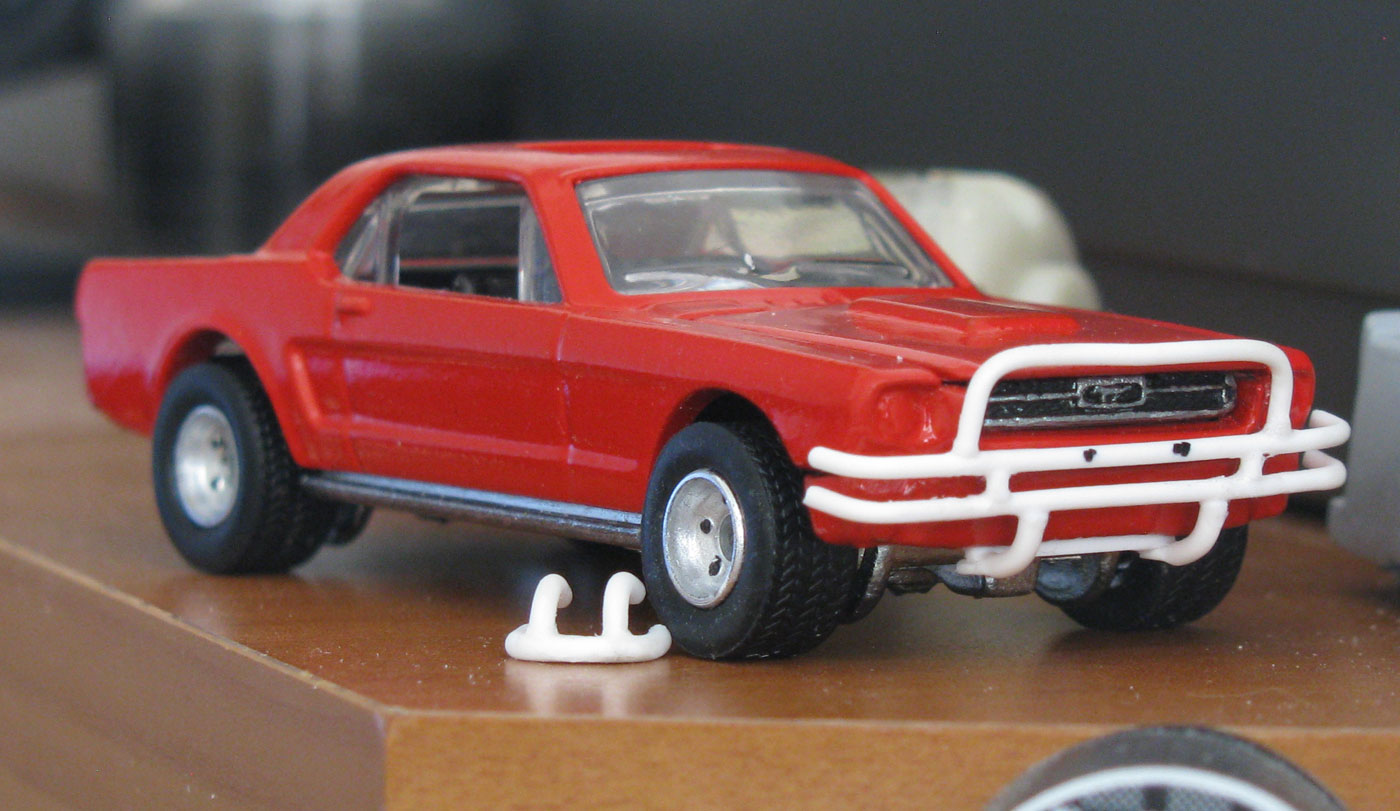
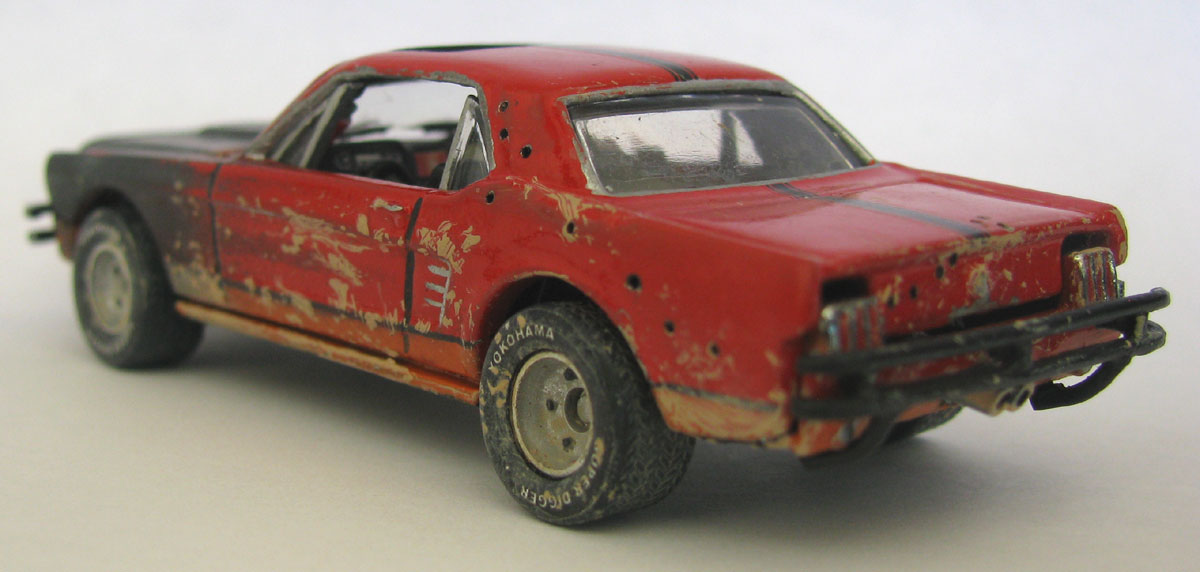
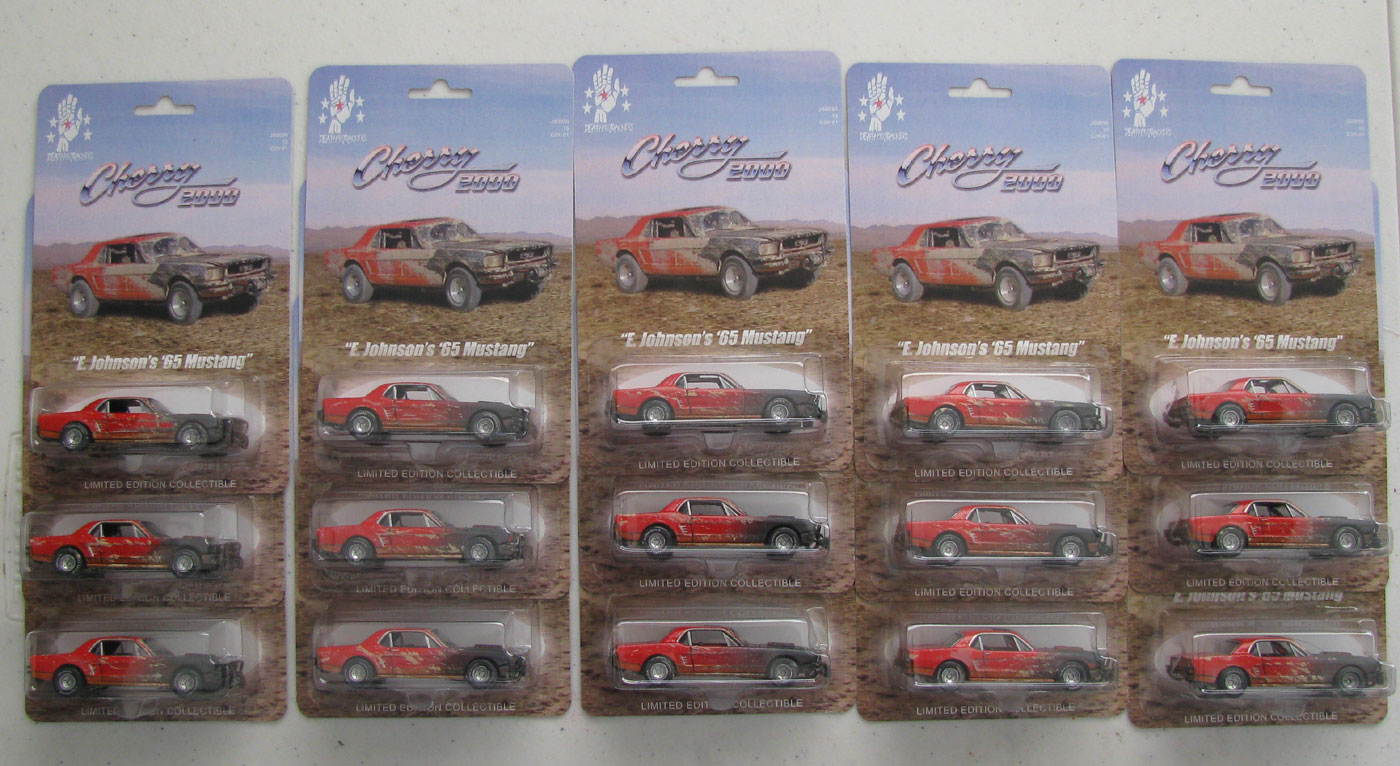
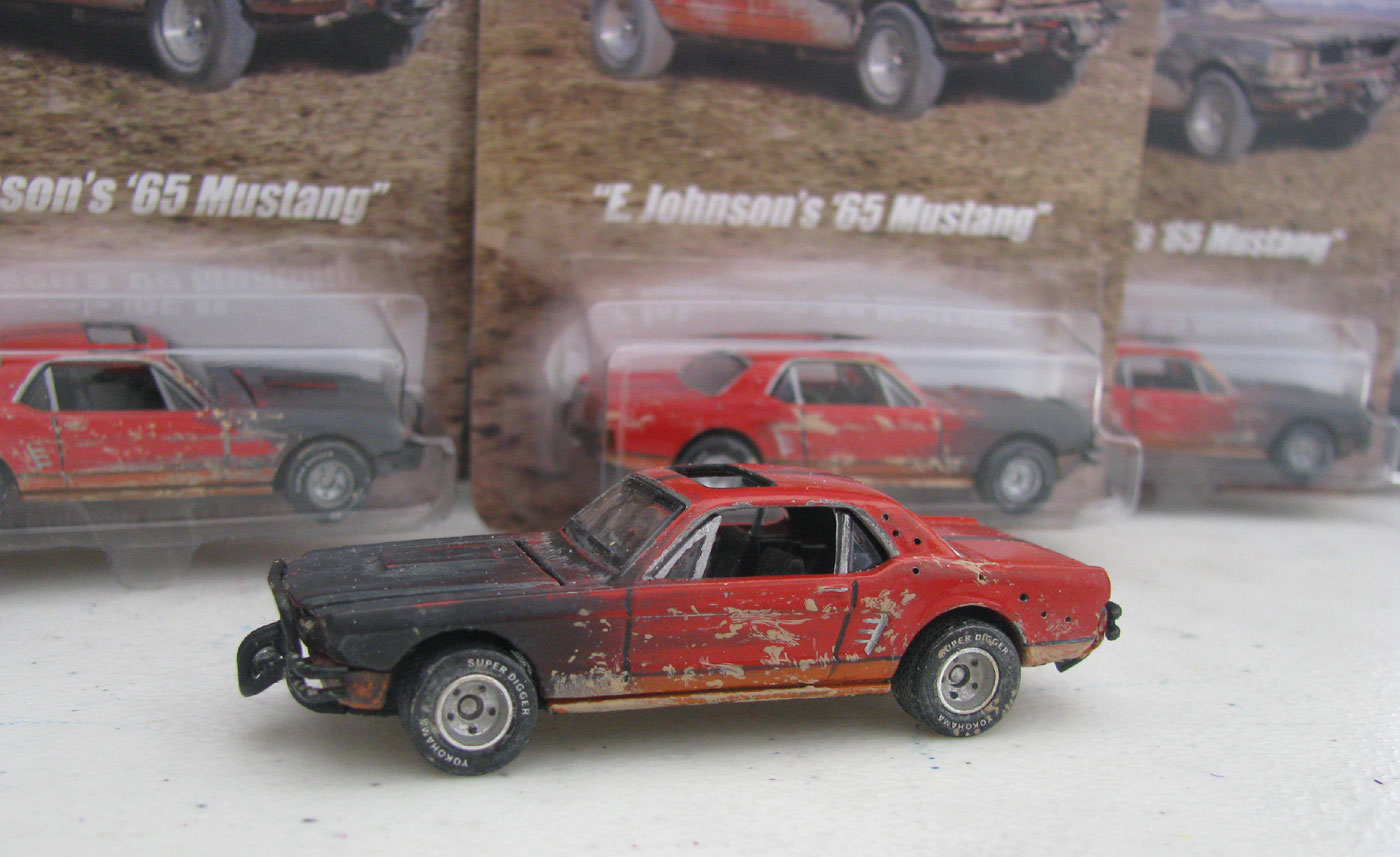
Cherry 2000 '65 Mustang |
| Base | Hot Wheels Ultra Hots '65 Mustang |
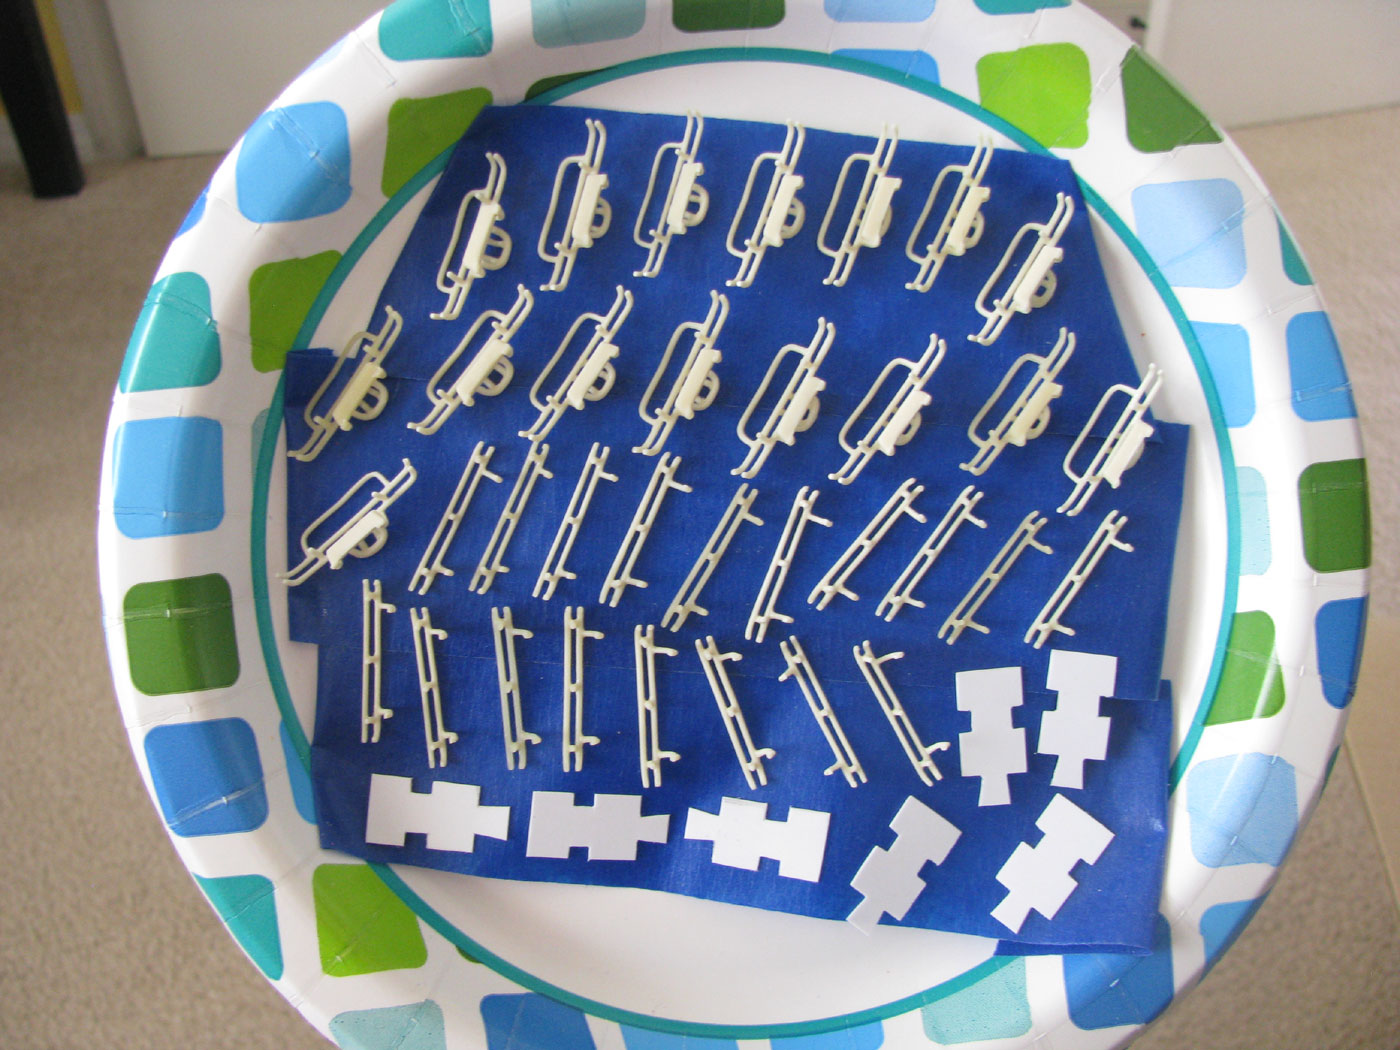
| Mods | Custom molded front and rear bars, decals, bullet holes, moon roof |
| Card | 5th Gen card w/rounded corners & punch, 2013, JS0030, C2K-01 |
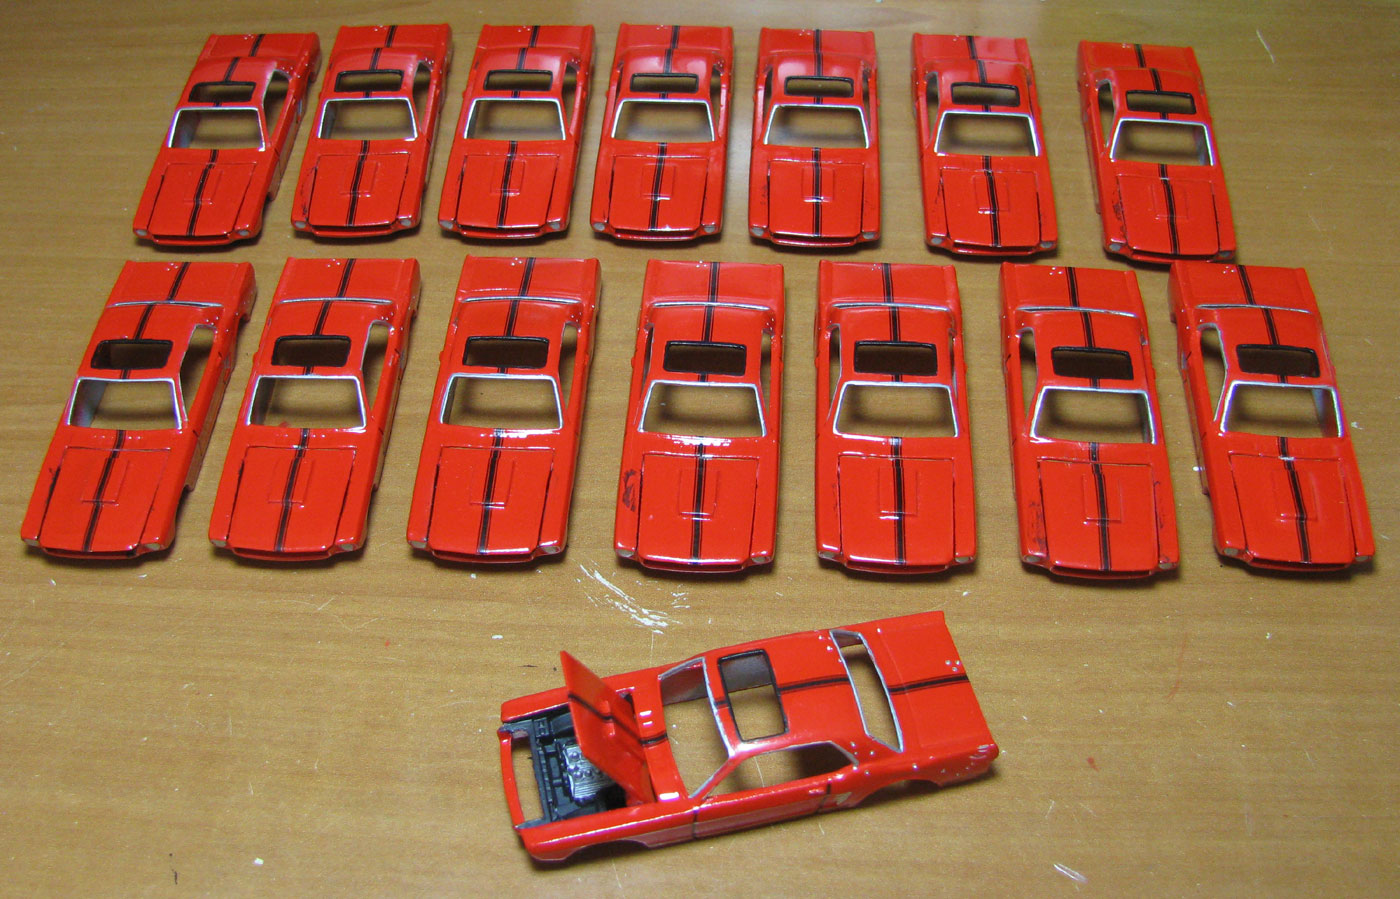
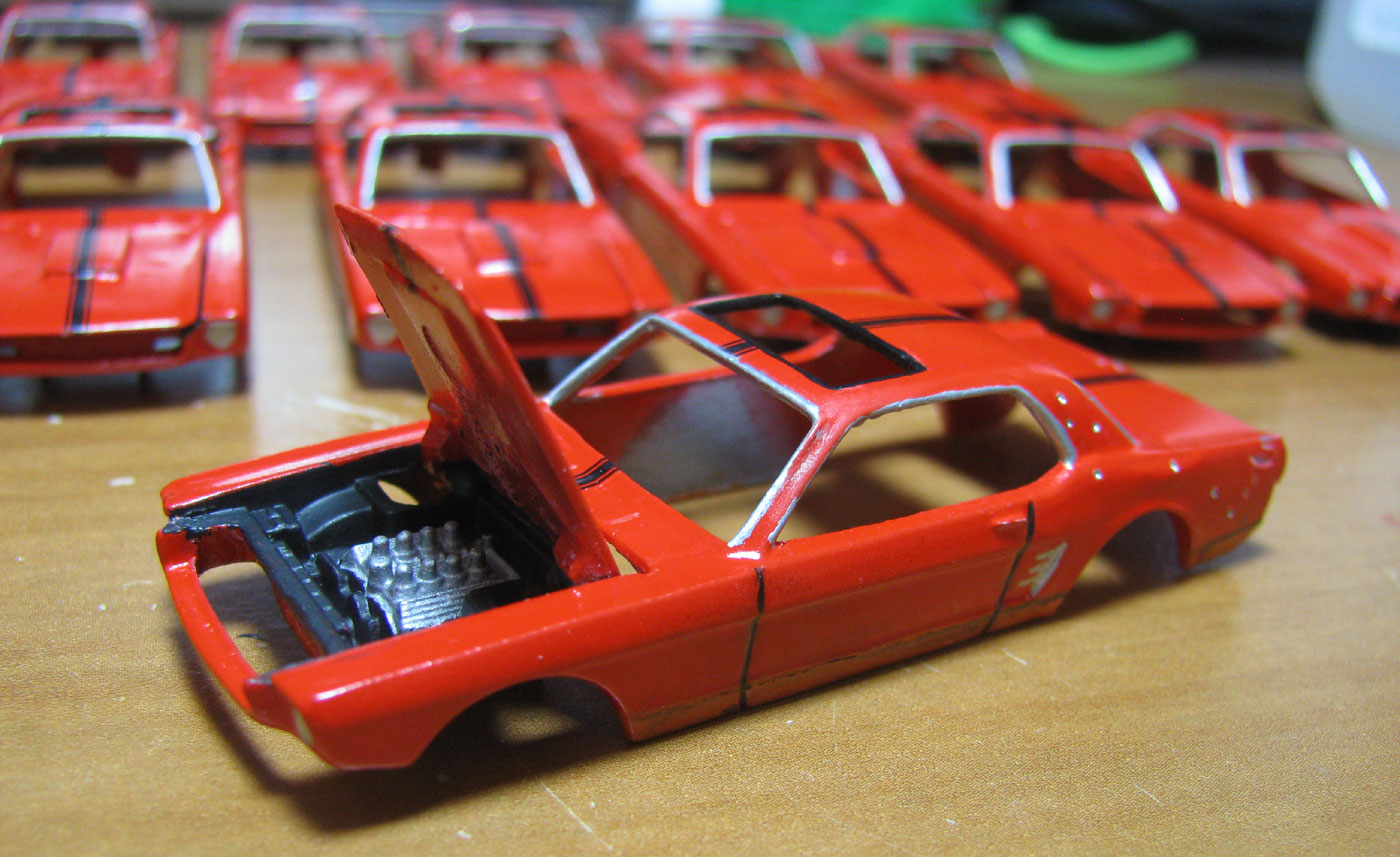
| Qty Made | 16 incl Prototype |
Ok, so if you're somewhere in your 30s or early 40s you might remember this one because it made the rounds on pay tv channels back in the late 1980s. Originally slated to be released in 1985, it got shelved til 1987 where Orion, unsure what to really do with it, released it on VHS. This was a real movie with real stars you've seen in other movies but can't quite place, and a sweet car that I totally fell in love with. The first part of the movie really revolves around this vehicle and if you consider how old it would be in 2047 it's pretty remarkable. Powered by some unknown source, this thing rules The Zone.
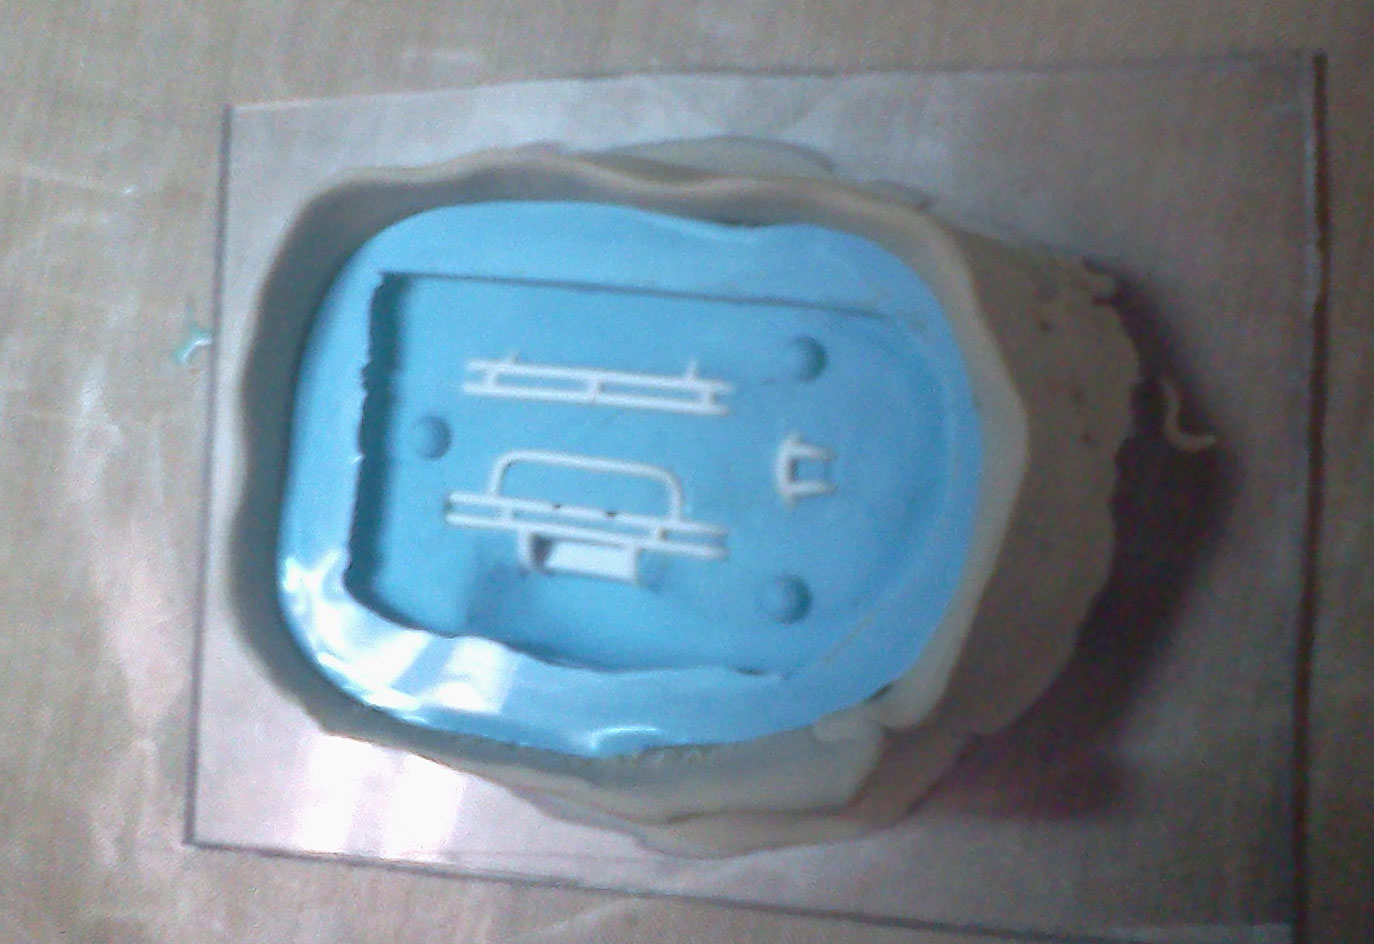
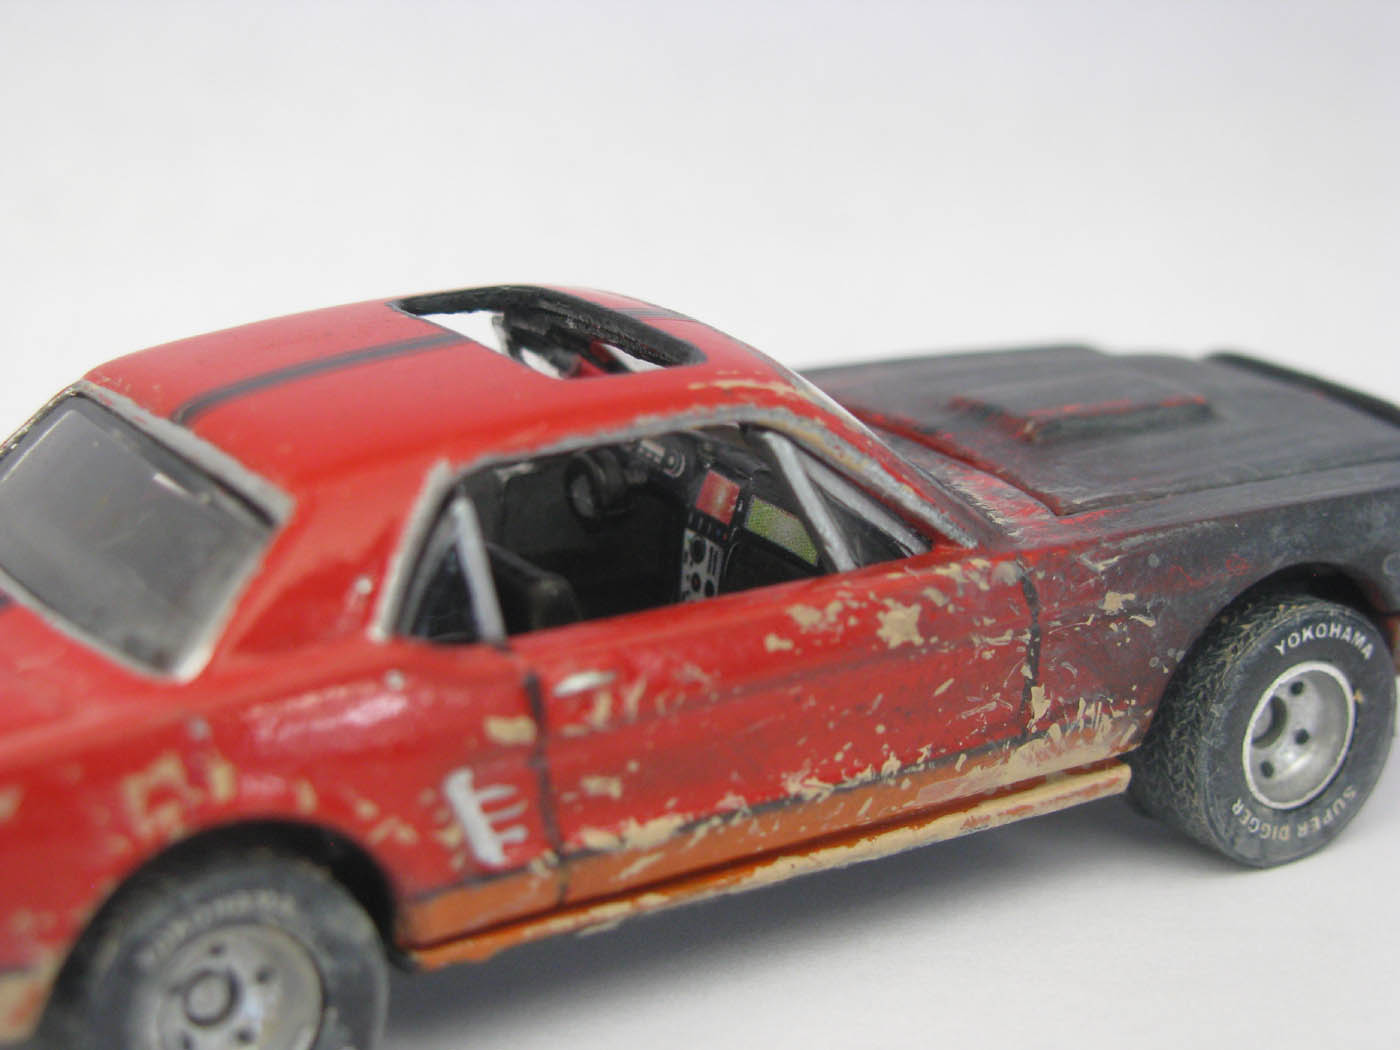
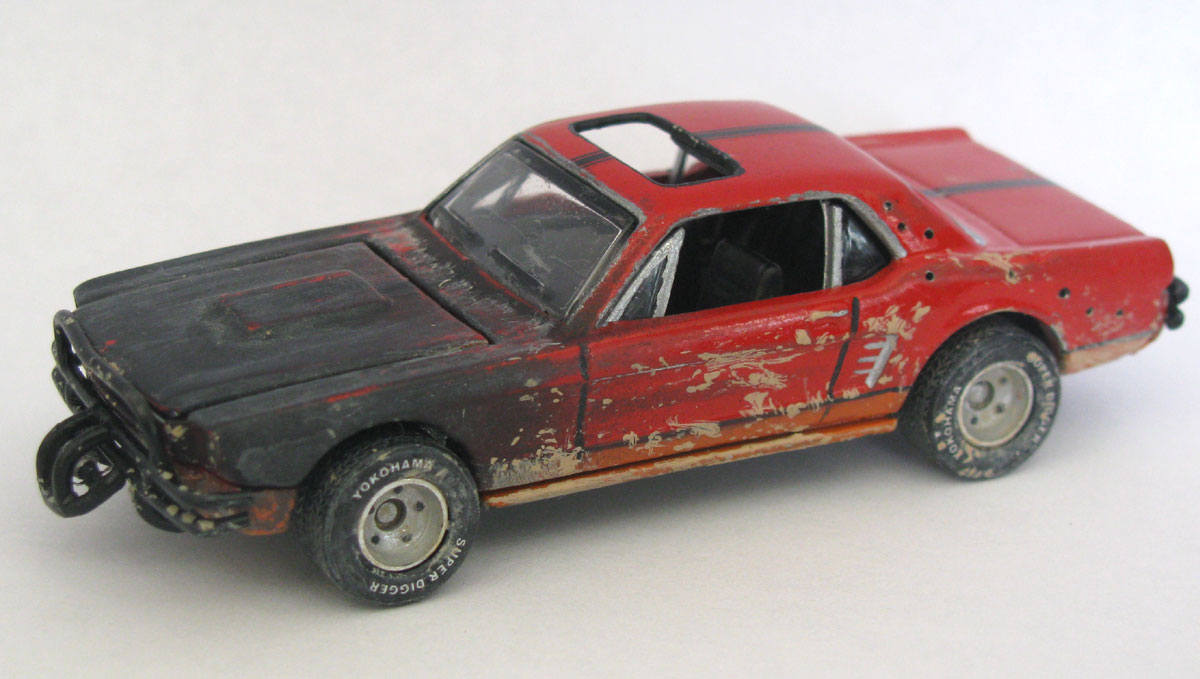
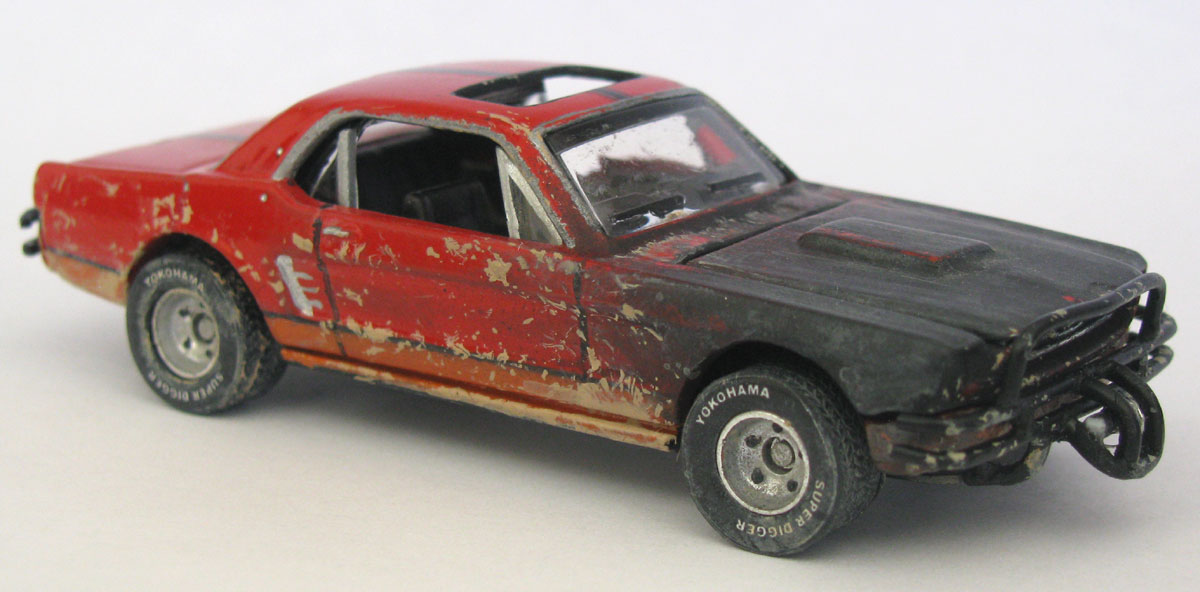
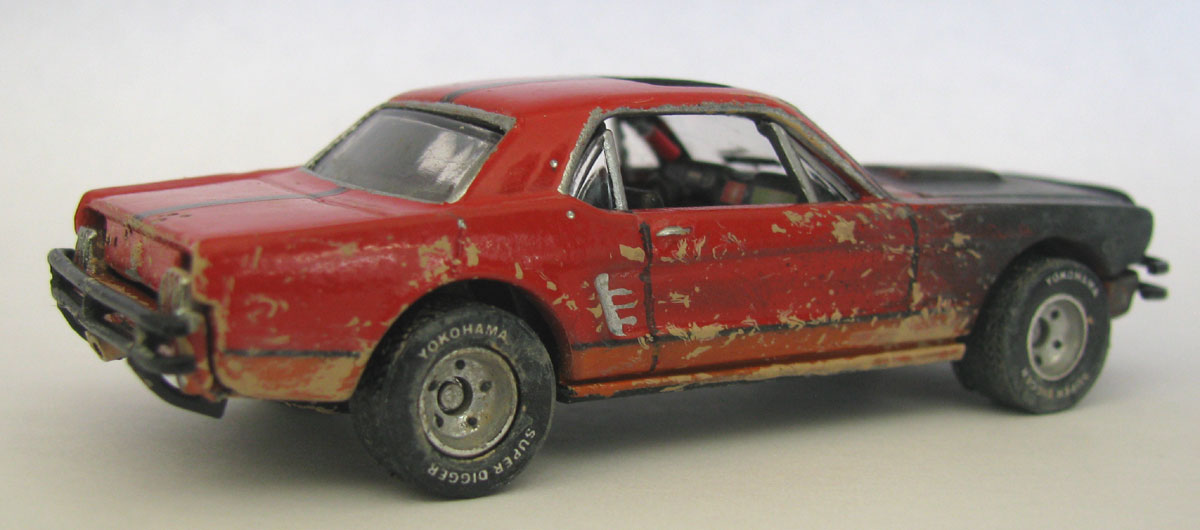
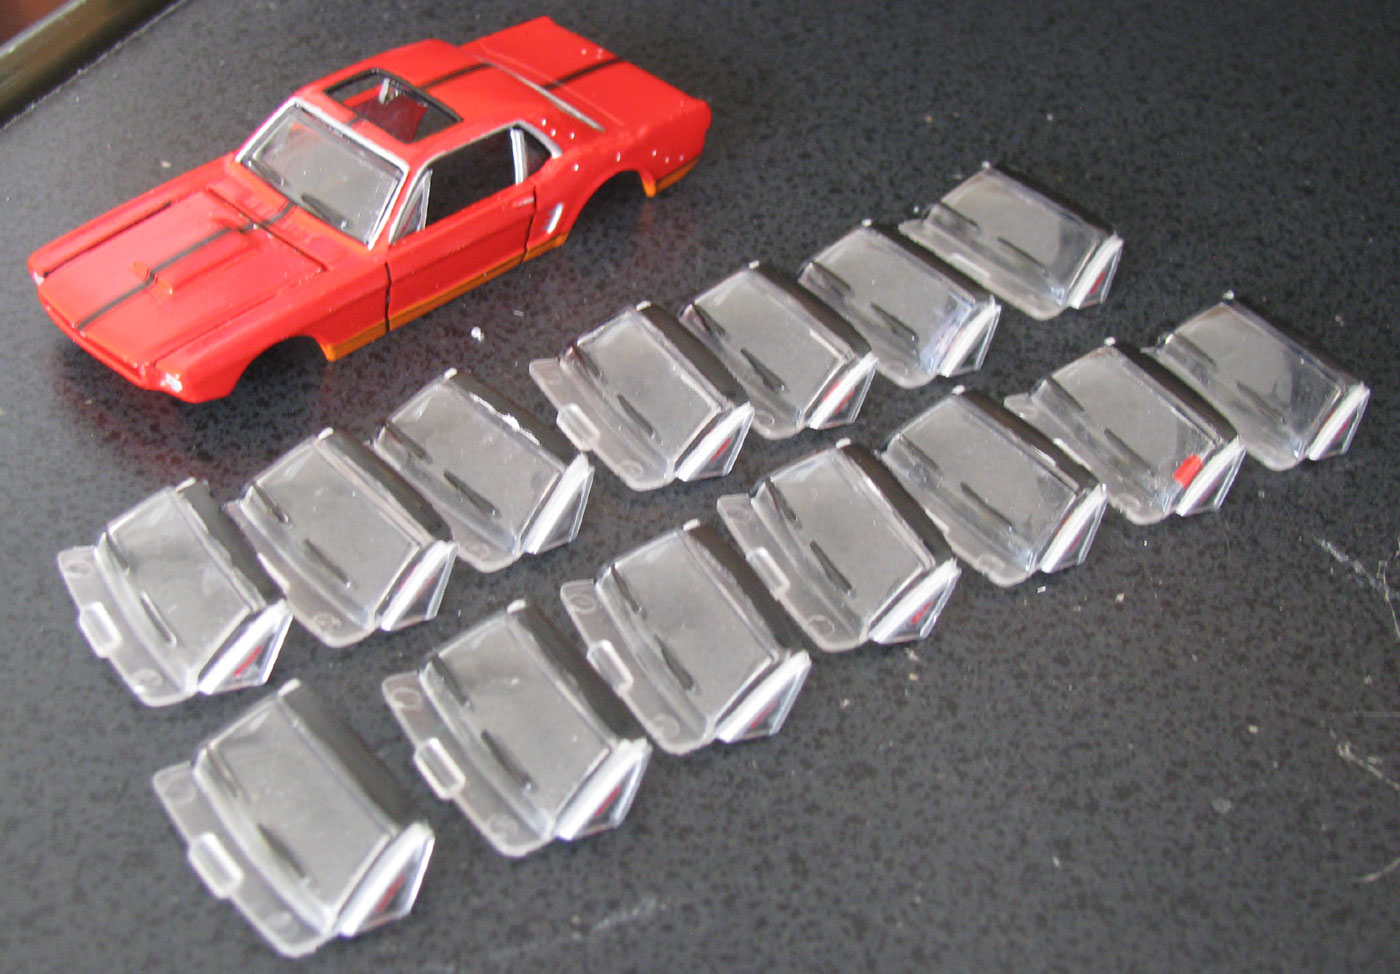
I was going to do this as a quick in-between project following Tango & Cash and before my 1/24 scale Jurassic Park Explorer. I figured I could get away with some paint and some bullet holes and I'd be good to go. Well after really studying this car I realized that wasn't going to cut it. I scratch built some front and rear bars and molded them (I still had to make the winches, little fire extinguishers for the interior, and skid plates by hand.) The details kept challenging me. I had to grind off the factory front and rear bumpers on the diecast chassis, and also removed the odd chassis circles that hung down.
While not my first use of waterslide decals on a 1/64 project, this was quite the elevation for me detail-wise. I made decals for the interior upper panel and center console with gauges, along with the thin stripes running the length of the vehicle, as well as the white lettering on the tires. You can't even really take a photo of the upper gauges.. but I assure you they're there.
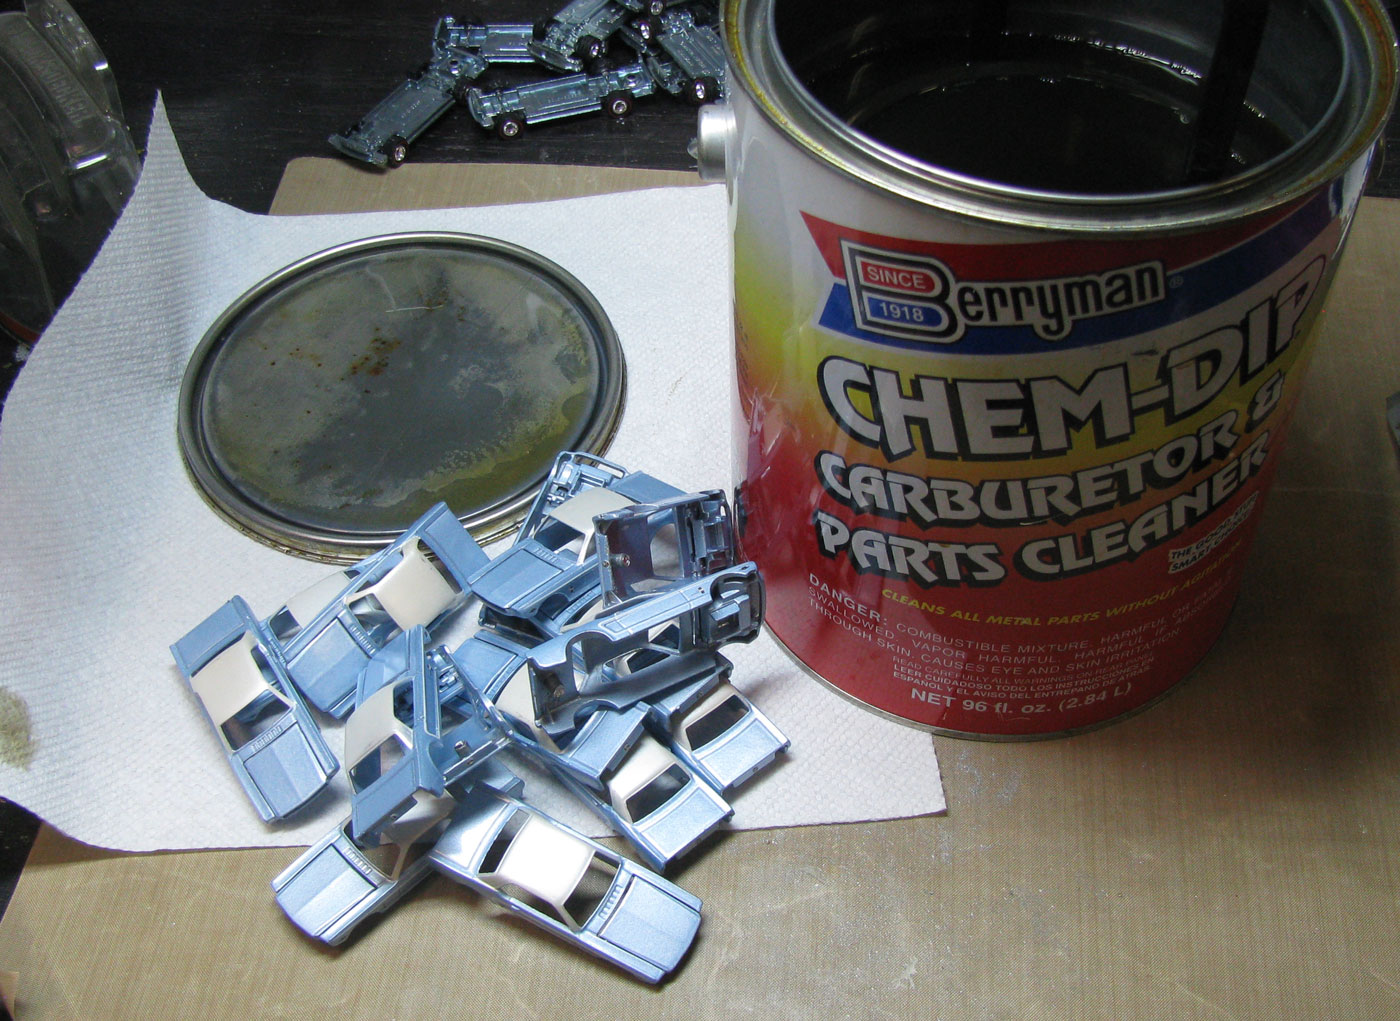
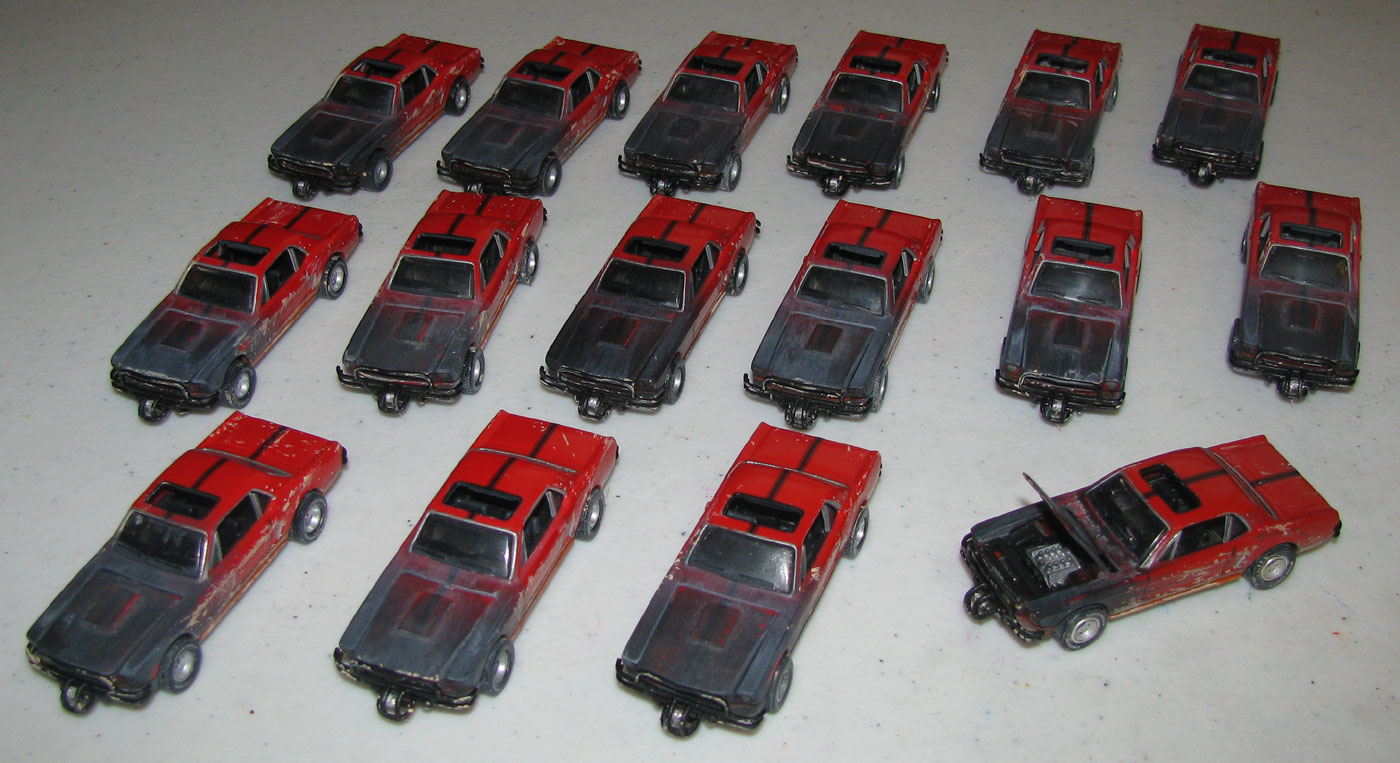
The bullet holes.. oh man. Well I like to learn something from each project. This one taught me that you shouldn't use pin vise bits with a dremel even if you have the attachment. I went through about a dozen bits drilling several hundred little holes both partway and all the way through the diecast bodies. I finally had broken so many that I decided to try it with just a regular power drill. That worked SO much better. I think at even the dremel knock-off's lowest setting it was still just melting and breaking the bits.
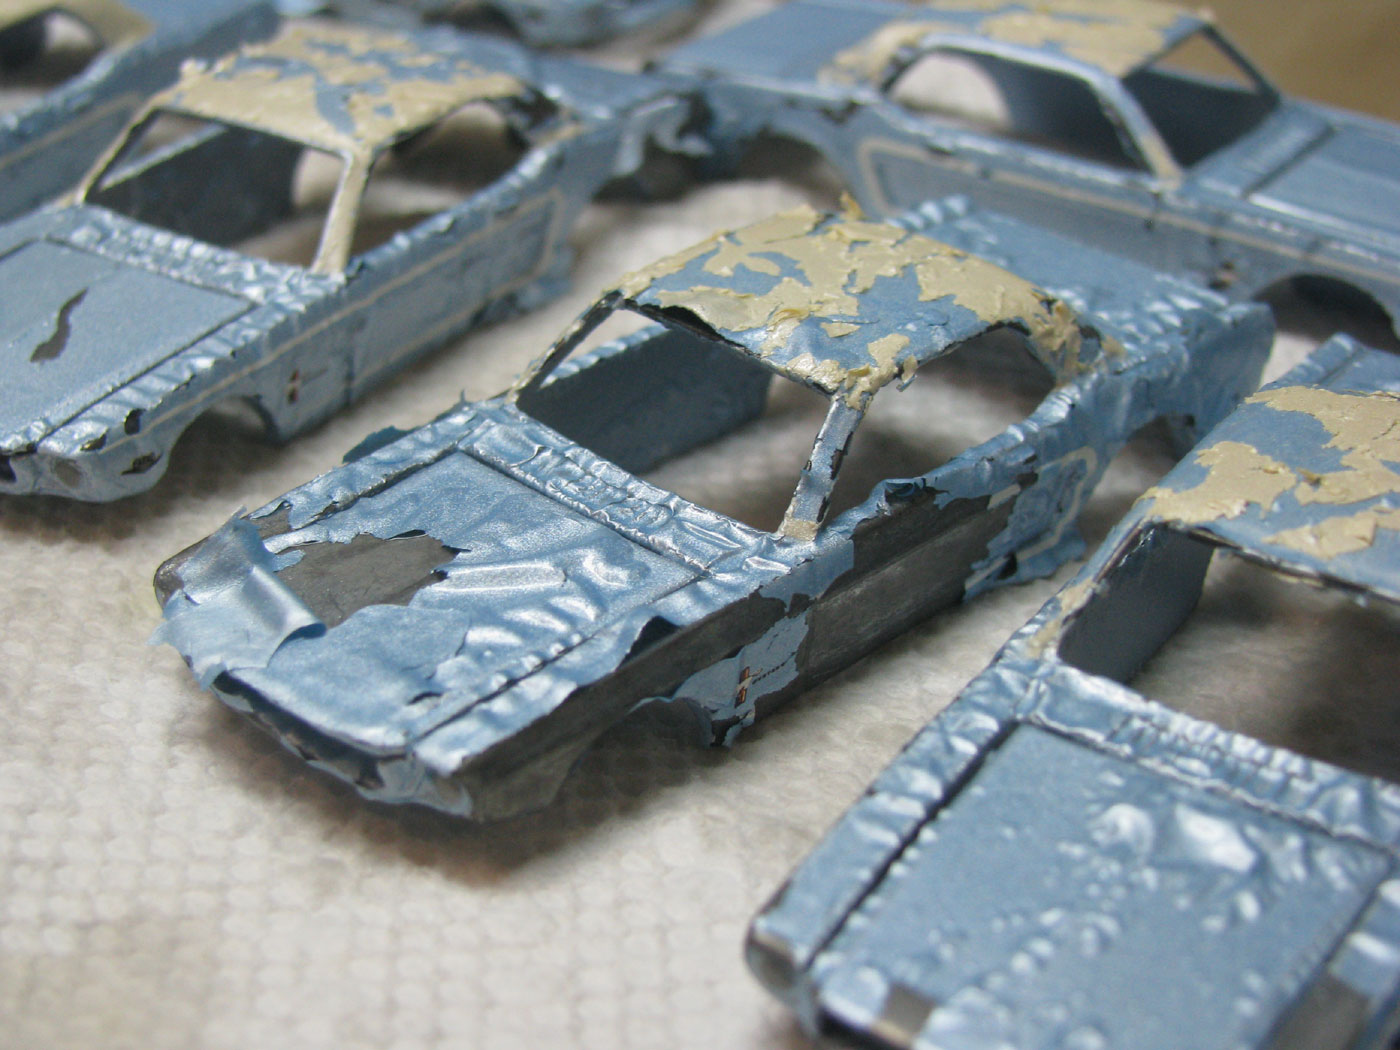
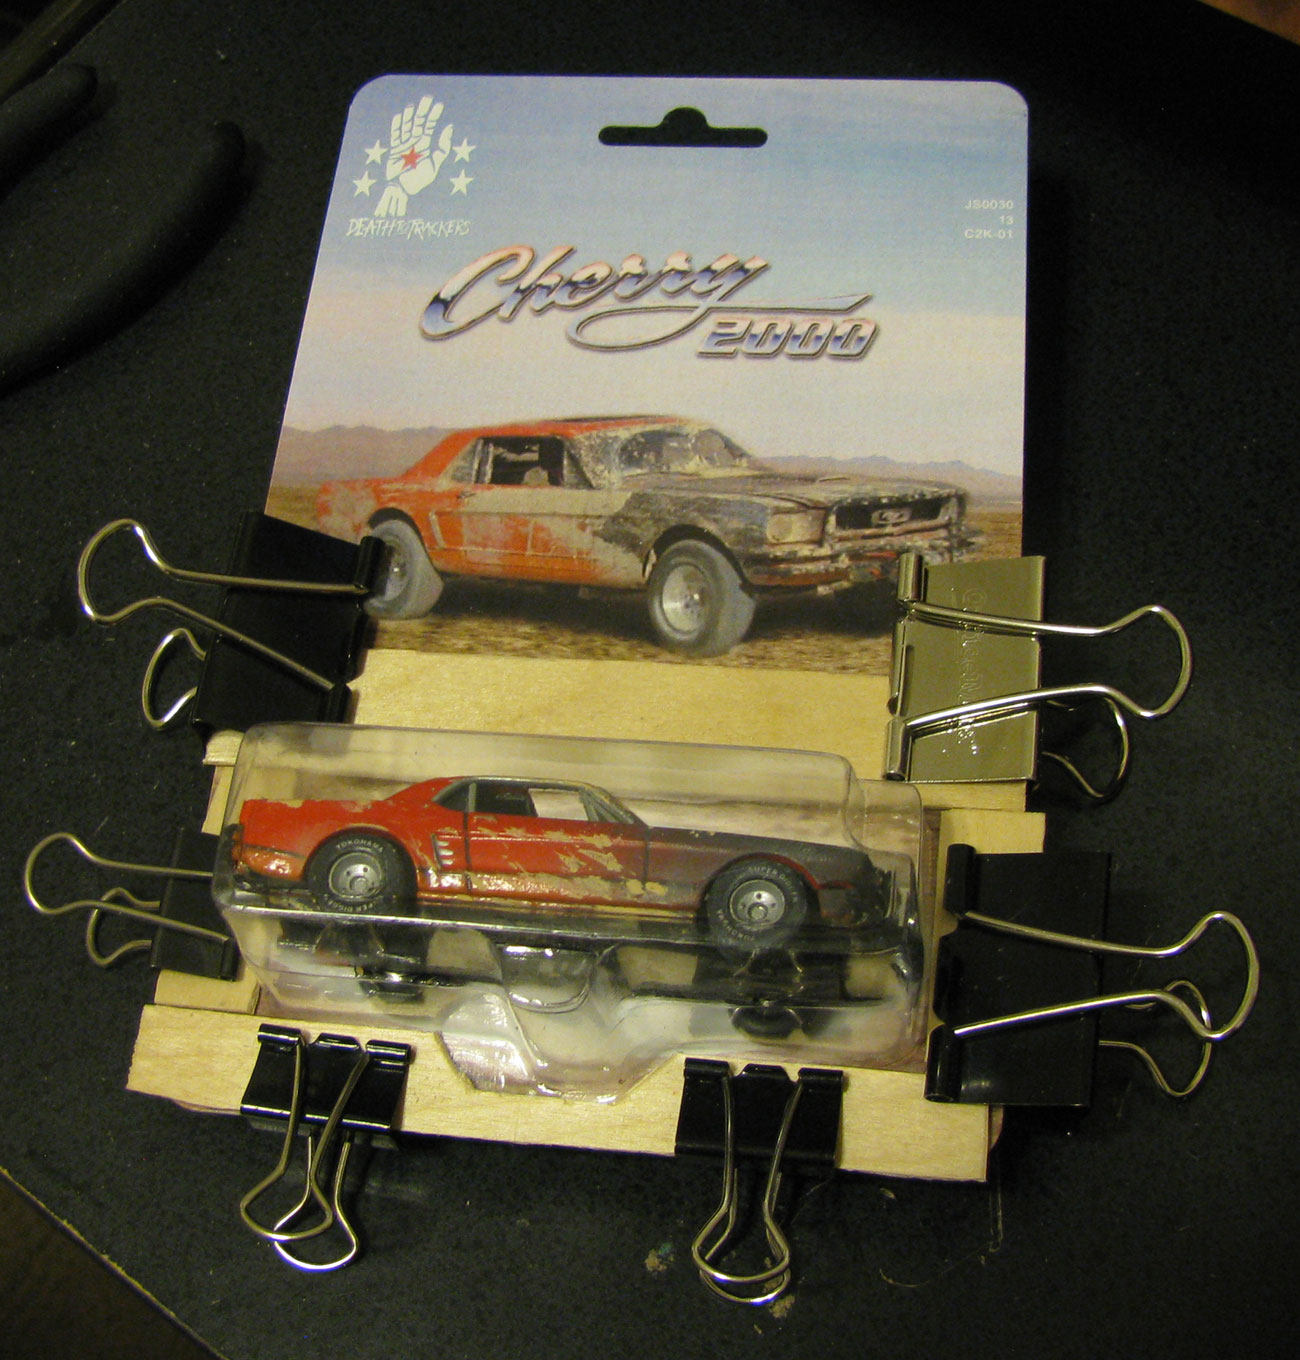
I got about 90% through making them, then I got distracted and on a huge roll with the JP Explorer and the cars just sat. there for about 5 months. Like when I finally moved them there were dust lines inbetween them. I finally made a push to find or make the right kind of card blister and airbrush the fire damage in early September, and finished them mid-September, 2013. The blisters were modified from another car with a little indentation so that it actually grips the car, resulting in no rattling and hopefully no damage to the bumper guards at either end. One other thing I tried was craft sticks and binder clips to put the blister on. Upside was a nice, clean mount every time. Downside was I could only do one at a time every few hours, so putting cars on cards took an entire weekend.
All in all, this is probably the most accurate replica I've made so far!.
|
|
|
|
|
|
|
|
|
|
|
|
|
|
|
|
|
|
|
|